Friday, August 25, 2017

Use own dataset for deep learning

Deep Learning

Preparation
1.  Virtual box and Vagrant

2.  Install Apache

3.  Install MySQL

4.  Install Python

5.  Hello World with Python

Deep learning programming
1. Install Keras and test deep learning

2. Save learned parameters and load the parameters

3. Save and load at a same time

4. Use own dataset

Use own dataset


We will try deeplearning what cat looks like and what dog looks like. At first, we need to get data set of dog/cat from somewhere. I downloaded the pictures from here: https://www.kaggle.com/c/dogs-vs-cats-redux-kernels-edition

If download and unzip the dataset file, you will see a lot of pictures there.

We will use them for the learning.

Before that, we will create folders to store them inside. Create a "data" folder:


Create "train" folder and "validation" folder in the data folder:


Open the train folder and create "cats" folder and "dogs" folder and store 200 pics of cat in cats folder and 200 pics of dog in the dog folder:

Now open the validation folder and create cats folder and dogs folder. Store 200 pics of cat in the cats folder and 200 of pics of dog in the dogs folder:

Create "dogvscat.py" and write as follows inside:
from __future__ import print_function

import numpy as np
import keras
from keras.models import Sequential
from keras.layers import Conv2D, MaxPooling2D
from keras.layers import Activation, Dropout, Flatten, Dense
from keras.preprocessing.image import ImageDataGenerator
from keras.models import model_from_json
from keras.layers import Dense, Dropout, Activation
from keras.preprocessing.text import Tokenizer
import keras.backend.tensorflow_backend as KTF
import tensorflow as tf
import os.path


f_log = './log'
f_model = './model/dogvscat'
model_yaml = 'dogvscat_model.yaml'
model_filename = 'dogvscat_model.json'
weights_filename = 'dogvscat_model_weights.hdf5'

batch_size = 32
epochs = 5
nb_validation_samples = 100

old_session = KTF.get_session()
print('Building model...')
session = tf.Session('')
KTF.set_session(session)

if os.path.isfile(os.path.join(f_model,model_filename)):
    print('Saved parameters found. I will use this file...')
    json_string = open(os.path.join(f_model, model_filename)).read()
    model = model_from_json(json_string)
    model.summary()
    model.compile(loss='categorical_crossentropy',
                optimizer='adam',
                metrics=['accuracy'])
    model.load_weights(os.path.join(f_model,weights_filename))
else:
    print('Saved parameters Not found. Creating new model...')
    model = Sequential()
    model.add(Conv2D(32, 3, 3, input_shape=(128, 128, 3)))
    model.add(Activation('relu'))
    model.add(MaxPooling2D(pool_size=(2, 2)))

    model.add(Conv2D(64, 3, 3))
    model.add(Activation('relu'))
    model.add(MaxPooling2D(pool_size=(2, 2)))

    model.add(Flatten())
    model.add(Dense(64))
    model.add(Activation('relu'))
    model.add(Dropout(0.5))
    model.add(Dense(2))
    model.add(Activation('softmax'))

    model.summary()

    model.compile(loss='categorical_crossentropy',
                optimizer='adam',
                metrics=['accuracy'])

train_datagen = ImageDataGenerator(
    rescale=1.0 / 255,
    shear_range=0.2,
    zoom_range=0.2,
    horizontal_flip=True)

test_datagen = ImageDataGenerator(rescale=1.0 / 255)

train_generator = train_datagen.flow_from_directory(
    'data/train',
    target_size=(128, 128),
    batch_size=batch_size,
    class_mode='categorical')

validation_generator = test_datagen.flow_from_directory(
    'data/validation',
    target_size=(128, 128),
    batch_size=batch_size,
    class_mode='categorical')

tb_cb = keras.callbacks.TensorBoard(log_dir=f_log, histogram_freq=0)
cp_cb = keras.callbacks.ModelCheckpoint(filepath = os.path.join(f_model,weights_filename), monitor='val_loss', verbose=1, save_best_only=True, mode='auto')
cbks = [tb_cb, cp_cb]

history = model.fit_generator(
    train_generator,
    steps_per_epoch=np.ceil(nb_validation_samples/batch_size),
    epochs=epochs,
    validation_data=validation_generator,
    validation_steps=np.ceil(nb_validation_samples/batch_size),
    callbacks=cbks
    )

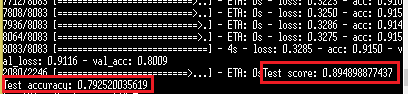
score = model.evaluate_generator(validation_generator, nb_validation_samples/batch_size)

print('')
print('Test score:', score[0])
print('Test accuracy:', score[1])

json_string = model.to_json()
open(os.path.join(f_model,model_filename), 'w').write(json_string)
yaml_string = model.to_yaml()
open(os.path.join(f_model,model_yaml), 'w').write(yaml_string)
print('save weights')
model.save_weights(os.path.join(f_model,weights_filename))
KTF.set_session(old_session)


Run these commands to start learning:
$ sudo cd /vagrant
$ sudo python3 dogvscat.py

Then deep learning from the dataset will start:


cakephp 3 date control

To create date picker in cakephp 3 (date range: 20 years):
$date_format = ['type' => 'date','dateFormat'=>'YMD','minYear'=>date('Y')-10,'maxYear'=>date('Y')+10,'monthNames' => true];
echo $this->Form->control('birth_date',$date_format);

If you want empty default date:
<?php
echo $this->Form->input(
        'Profile.dob',
        array(
            'label'         => 'Date picker',
            'type' => 'date',
            'dateFormat'    => 'YMD',
            'minYear'       => date('Y') - 10,
            'maxYear'       => date('Y') + 10,
            'empty'         => array(
                'day'       => 'DAY',
                'month'     => 'MONTH',
                'year'      => 'YEAR'
                )
            )
        );
?>

Please note, if you do like this, you can leave some of y/m/d empty:
<?php

    $array = array(
        'type'          => 'date',
        'label'         => 'Date picker',
        'dateFormat'    => 'YMD',
        'minYear'       => date('Y') - 10,
        'maxYear'       => date('Y') - 10,
        'empty'         => array(
            'day'       => 'DAY',
            'month'     => 'MONTH',
            'year'      => 'YEAR'
            )
        );

$array = array_merge($array, ['value' => array(
       'day' => '', //empty day
       'month' => '8',
       'year' => '2017'
       )
     ]);

echo $this->Form->input(
    'datepicker_test',
    $array
    );


?>


Save and load at a same time

Deep Learning

Preparation
1.  Virtual box and Vagrant

2.  Install Apache

3.  Install MySQL

4.  Install Python

5.  Hello World with Python

Deep learning programming
1. Install Keras and test deep learning

2. Save learned parameters and load the parameters

3. Save and load at a same time

4. Use own dataset

Save and load at a same time


1. Create a "reuters_tosaveload.py" file and open the file. Write as follows in the file:
#!/usr/bin/env python
# -*- coding: UTF-8 -*-

'''Trains and evaluate a simple MLP
on the Reuters newswire topic classification task.
'''
from __future__ import print_function

import numpy as np
import keras
from keras.datasets import reuters
from keras.models import Sequential
from keras.models import model_from_json
from keras.layers import Dense, Dropout, Activation
from keras.utils import np_utils
from keras.optimizers import Adam
from keras.preprocessing.text import Tokenizer
import keras.callbacks
import keras.backend.tensorflow_backend as KTF
import tensorflow as tf
import os.path

f_log = './log'
f_model = './model'
model_filename = 'reuters_model.json'
weights_filename = 'reuters_model_weights.hdf5'

max_words = 1000
batch_size = 32
epochs = 5

print('Loading data...')
(x_train, y_train), (x_test, y_test) = reuters.load_data(num_words=max_words,
                                                         test_split=0.2)
print(len(x_train), 'train sequences')
print(len(x_test), 'test sequences')

num_classes = np.max(y_train) + 1
print(num_classes, 'classes')

print('Vectorizing sequence data...')
tokenizer = Tokenizer(num_words=max_words)
x_train = tokenizer.sequences_to_matrix(x_train, mode='binary')
x_test = tokenizer.sequences_to_matrix(x_test, mode='binary')
print('x_train shape:', x_train.shape)
print('x_test shape:', x_test.shape)

print('Convert class vector to binary class matrix '
      '(for use with categorical_crossentropy)')
y_train = keras.utils.to_categorical(y_train, num_classes)
y_test = keras.utils.to_categorical(y_test, num_classes)

old_session = KTF.get_session()

print('y_train shape:', y_train.shape)
print('y_test shape:', y_test.shape)

print('Building model...')
session = tf.Session('')
KTF.set_session(session)

json_string = open(os.path.join(f_model, model_filename)).read()
model = model_from_json(json_string)

model.summary()
model.compile(loss='categorical_crossentropy',
              optimizer='adam',
              metrics=['accuracy'])
model.load_weights(os.path.join(f_model,weights_filename))

tb_cb = keras.callbacks.TensorBoard(log_dir=f_log, histogram_freq=0)
cp_cb = keras.callbacks.ModelCheckpoint(filepath = os.path.join(f_model,'reuters_model{epoch:02d}-loss{loss:.2f}-acc{acc:.2f}-vloss{val_loss:.2f}-vacc{val_acc:.2f}.hdf5'), monitor='val_loss', verbose=1, save_best_only=True, mode='auto')
cbks = [tb_cb, cp_cb]

history = model.fit(x_train, y_train,
                    batch_size=batch_size,
                    epochs=epochs,
                    verbose=1,
                    validation_split=0.1,
                    callbacks=cbks)
score = model.evaluate(x_test, y_test,
                       batch_size=batch_size, verbose=1)
print('')
print('Test score:', score[0])
print('Test accuracy:', score[1])
print('save the architecture of a model')

json_string = model.to_json()
open(os.path.join(f_model,'reuters_model.json'), 'w').write(json_string)
yaml_string = model.to_yaml()
open(os.path.join(f_model,'reuters_model.yaml'), 'w').write(yaml_string)
print('save weights')
model.save_weights(os.path.join(f_model,'reuters_model_weights.hdf5'))
KTF.set_session(old_session)

This file will save the parameters and load the parameters at a same time. We will try this script. Run the following commands:
$ sudo cd /vagrant
$ sudo python3 reuters_tosaveload.php

Then the learning will start:

Learning and test finished.
The test accuracy is getting lower and the test score is getting higher.
Maybe because I'm using exactly same data set repeatedly.


Sunday, August 20, 2017

Save learned parameters and load the parameters

Deep Learning

Preparation
1.  Virtual box and Vagrant

2.  Install Apache

3.  Install MySQL

4.  Install Python

5.  Hello World with Python

Deep learning programming
1. Install Keras and test deep learning

2. Save learned parameters and load the parameters

3. Save and load at a same time

4. Use own dataset

Save and load at a same time

Original Source


We will make a new program that learns how to categorize reuters news texts. We will use MNIST dataset which is attached to Keras by default (maybe this dataset is intended to be used for practice.)

Create a "reuters.py" file in the shared folder like this:


Write this code, to learn the classification, inside "reuters.py" (this code is cited from fchollet/keras):
#!/usr/bin/env python
# -*- coding: UTF-8 -*-

'''Trains and evaluate a simple MLP
on the Reuters newswire topic classification task.
'''
from __future__ import print_function

import numpy as np
import keras
from keras.datasets import reuters
from keras.models import Sequential
from keras.layers import Dense, Dropout, Activation
from keras.preprocessing.text import Tokenizer

max_words = 1000
batch_size = 32
epochs = 5

print('Loading data...')
(x_train, y_train), (x_test, y_test) = reuters.load_data(num_words=max_words,
                                                         test_split=0.2)
print(len(x_train), 'train sequences')
print(len(x_test), 'test sequences')

num_classes = np.max(y_train) + 1
print(num_classes, 'classes')

print('Vectorizing sequence data...')
tokenizer = Tokenizer(num_words=max_words)
x_train = tokenizer.sequences_to_matrix(x_train, mode='binary')
x_test = tokenizer.sequences_to_matrix(x_test, mode='binary')
print('x_train shape:', x_train.shape)
print('x_test shape:', x_test.shape)

print('Convert class vector to binary class matrix '
      '(for use with categorical_crossentropy)')
y_train = keras.utils.to_categorical(y_train, num_classes)
y_test = keras.utils.to_categorical(y_test, num_classes)
print('y_train shape:', y_train.shape)
print('y_test shape:', y_test.shape)

print('Building model...')
model = Sequential()
model.add(Dense(512, input_shape=(max_words,)))
model.add(Activation('relu'))
model.add(Dropout(0.5))
model.add(Dense(num_classes))
model.add(Activation('softmax'))

model.compile(loss='categorical_crossentropy',
              optimizer='adam',
              metrics=['accuracy'])

history = model.fit(x_train, y_train,
                    batch_size=batch_size,
                    epochs=epochs,
                    verbose=1,
                    validation_split=0.1)
score = model.evaluate(x_test, y_test,
                       batch_size=batch_size, verbose=1)
print('Test score:', score[0])
print('Test accuracy:', score[1])

And run this code:
$ cd /vagrant
$ sudo python3.6 reuters.py

The accuracy is not very good at first.

Learning finished. The accuracy is about 79%.


Save the learned parameters


To save the parameters learned by the first try, we will use save_weights/load_weights:
model.save_weights('param.hdf5')
model.load_weights('param.hdf5')

To save parameters which are still being used by the machine in the midst of learning, we will use Callback. We will use ModelCheckpoint which is a kind of callback. The callback is called at the end of every epoch.

Arguments
filepath : The path for the file in which the parameters will be saved.
monitor: What value should be monitored.
verbose : Whether comments should be printed or not.
save_best_only: Save only when the accuracy becomes better.
mode: How the monitored value is saved.

We will create a python file that learns how to categorize the reuters news and save the parameters. Create a file "reuters_save.py". Then create folders "model" and "log".

And write this code inside the file.
#!/usr/bin/env python
# -*- coding: UTF-8 -*-

'''Trains and evaluate a simple MLP
on the Reuters newswire topic classification task.
'''
from __future__ import print_function

import numpy as np
import keras
from keras.datasets import reuters
from keras.models import Sequential
from keras.layers import Dense, Dropout, Activation
from keras.layers.convolutional import Convolution2D, MaxPooling2D
from keras.layers.normalization import BatchNormalization
from keras.utils import np_utils
from keras.optimizers import Adam
import keras.callbacks
from keras.preprocessing.text import Tokenizer
import keras.backend.tensorflow_backend as KTF
import tensorflow as tf
import os.path

f_log = './log'
f_model = './model'

max_words = 1000
batch_size = 32
epochs = 5

print('Loading data...')
(x_train, y_train), (x_test, y_test) = reuters.load_data(num_words=max_words,
                                                         test_split=0.2)
print(len(x_train), 'train sequences')
print(len(x_test), 'test sequences')

num_classes = np.max(y_train) + 1
print(num_classes, 'classes')

print('Vectorizing sequence data...')
tokenizer = Tokenizer(num_words=max_words)
x_train = tokenizer.sequences_to_matrix(x_train, mode='binary')
x_test = tokenizer.sequences_to_matrix(x_test, mode='binary')
print('x_train shape:', x_train.shape)
print('x_test shape:', x_test.shape)

print('Convert class vector to binary class matrix '
      '(for use with categorical_crossentropy)')
y_train = keras.utils.to_categorical(y_train, num_classes)
y_test = keras.utils.to_categorical(y_test, num_classes)

old_session = KTF.get_session()

print('y_train shape:', y_train.shape)
print('y_test shape:', y_test.shape)

print('Building model...')
model = Sequential()
model.add(Dense(512, input_shape=(max_words,)))
model.add(Activation('relu'))
model.add(Dropout(0.5))
model.add(Dense(num_classes))
model.add(Activation('softmax'))

model.compile(loss='categorical_crossentropy',
              optimizer='adam',
              metrics=['accuracy'])

tb_cb = keras.callbacks.TensorBoard(log_dir=f_log, histogram_freq=0)
cp_cb = keras.callbacks.ModelCheckpoint(filepath = os.path.join(f_model,'reuters_model{epoch:02d}-loss{loss:.2f}-acc{acc:.2f}-vloss{val_loss:.2f}-vacc{val_acc:.2f}.hdf5'), monitor='val_loss', verbose=1, save_best_only=True, mode='auto')
cbks = [tb_cb, cp_cb]

history = model.fit(x_train, y_train,
                    batch_size=batch_size,
                    epochs=epochs,
                    verbose=1,
                    validation_split=0.1,
                    callbacks=cbks)
score = model.evaluate(x_test, y_test,
                       batch_size=batch_size, verbose=1)
print('')
print('Test score:', score[0])
print('Test accuracy:', score[1])

print('save the architecture of a model')
json_string = model.to_json()
open(os.path.join(f_model,'reuters_model.json'), 'w').write(json_string)
yaml_string = model.to_yaml()
open(os.path.join(f_model,'reuters_model.yaml'), 'w').write(yaml_string)
print('save weights')
model.save_weights(os.path.join(f_model,'reuters_model_weights.hdf5'))
KTF.set_session(old_session)

And run this command to start the learning.
$ python3.6 reuters_tosave.py

The parameters were saved.

Then look inside the "Model" folder:
These files are the files in which the learned parameters are saved.


Load the learned parameters


Now we will load the saved parameters. Create "reuters_toload.py" inside the shared folder:

And write this code inside the file.
#!/usr/bin/env python
# -*- coding: UTF-8 -*-

'''Trains and evaluate a simple MLP
on the Reuters newswire topic classification task.
'''
from __future__ import print_function

import numpy as np
import keras
from keras.datasets import reuters
from keras.models import Sequential
from keras.models import model_from_json
from keras.layers import Dense, Dropout, Activation
from keras.preprocessing.text import Tokenizer
from keras.utils import np_utils
from keras.optimizers import Adam
import keras.callbacks
import keras.backend.tensorflow_backend as KTF
import tensorflow as tf
import os.path

f_log = './log'
f_model = './model'
model_filename = 'reuters_model.json'
weights_filename = 'reuters_model_weights.hdf5'

max_words = 1000
batch_size = 32
epochs = 5

print('Loading data...')
(x_train, y_train), (x_test, y_test) = reuters.load_data(num_words=max_words,
                                                         test_split=0.2)
print(len(x_train), 'train sequences')
print(len(x_test), 'test sequences')

num_classes = np.max(y_train) + 1
print(num_classes, 'classes')

print('Vectorizing sequence data...')
tokenizer = Tokenizer(num_words=max_words)
x_train = tokenizer.sequences_to_matrix(x_train, mode='binary')
x_test = tokenizer.sequences_to_matrix(x_test, mode='binary')
print('x_train shape:', x_train.shape)
print('x_test shape:', x_test.shape)

print('Convert class vector to binary class matrix '
      '(for use with categorical_crossentropy)')
y_train = keras.utils.to_categorical(y_train, num_classes)
y_test = keras.utils.to_categorical(y_test, num_classes)

old_session = KTF.get_session()

print('y_train shape:', y_train.shape)
print('y_test shape:', y_test.shape)

print('Building model...')
session = tf.Session('')
KTF.set_session(session)

json_string = open(os.path.join(f_model, model_filename)).read()
model = model_from_json(json_string)

model.summary()
model.compile(loss='categorical_crossentropy',
              optimizer='adam',
              metrics=['accuracy'])
model.load_weights(os.path.join(f_model,weights_filename))
cbks = []

history = model.fit(x_train, y_train,
                    batch_size=batch_size,
                    epochs=epochs,
                    verbose=1,
                    validation_split=0.1,
                    callbacks=cbks)
score = model.evaluate(x_test, y_test,
                       batch_size=batch_size, verbose=1)
print('')
print('Test score:', score[0])
print('Test accuracy:', score[1])

Run this command to start the learning:
$ python3.6 reuters_toload.py

The test accuracy is high from the beginning because it's using the saved parameters.

You can see that the test score is higher. (actually the higher it is, the worse it is)
Test accuracy is not very different though.
Maybe because I used exactly same dataset?

Useful Linux commands

To check status of ports and established connections:
$ sudo netstat -an

If you want to search something (for example "80") from the ports information:
$ sudo netstat -an | grep 80

To check the server's error log:
$ sudo less /var/log/httpd/error_log

To check the server's IP address:
$ sudo ifconfig

To create symbolic link (Create a symbolic link "python3.5" that refers to /bin/python):
$ sudo ln -s /bin/python3.5 /bin/python

To create symbolic link from vagrant's shared folder to apache's html:
$ sudo rm -rf /var/www/html
$ sudo ln -fs /vagrant /var/www/html 

To delete a symbolic link:
$ sudo unlink /bin/python3 


Saturday, August 19, 2017

Use Visual studio code for PHP and Virtual Machine, Vagrant

This is for windows.

1. Download and install Visual Studio Code from the official page.
https://code.visualstudio.com/download

2. Start the Visual Studio Code. And click the square symbol to install extensions for PHP.
You can search extensions from here.

3. Install these extensions: php intelliSence, HTML CSS support, PHP debug

4. Close the Visual studio code and open it again.

5. Maybe you will see this error. Ignore it now.

6. Download PHP from here: http://windows.php.net/download#php-7.1
I chose PHP 7.1 because it's being used in my virtual server.

7. Create a folder for PHP in this directory: C:\. Save the downloaded PHP inside this folder.

 From the extracted folder, just copy and paste all of the files 
to the PHP folder which we created under C:\.

Then add the path (C:\PHP) to the environment variables.

Go to:
Control Panel  >  System and Security  >  System
Then open Advanced system settings.

Open environment variables.

Add "C:\PHP;" to the PATH variable. If end of the path doesn't have ";", you need to add ";" like ";C:\PHP" because each path must be separated by ";".


You can check if the path is working by running "php -version" command on cmd:
Please note that you need to reopen the cmd after you change the environment path.


8. Close the Visual Studio code and open it again.

9. You will see this error. Click the "Open settings".


10. You can see 2 windows. In the right window, add below codes:
"php.validate.executablePath": "C:/PHP/php.exe",
"php.executablePath": "C:/PHP/php.exe"


11. Close the Visual Studio Code and open it again. The PHP executable not found error should be gone now. Now click the bug symbol on the left menu.

12. Click the gear symbol and choose PHP. Then launch.json will be generated automatically.
 

13. Open your launch.json and write like this:


{
    "version": "0.2.0",
    "configurations": [
        {
            "name": "Listen for XDebug",
            "type": "php",
            "request": "launch",
            "port": 9000,
            //Your project's path in the server
            "pathMappings": {
                "/vagrant": "${workspaceRoot}"
            }
        },
        {
            "name": "Launch currently open script",
            "type": "php",
            "request": "launch",
            "program": "${file}",
            "cwd": "${fileDirname}",
            "port": 9000
        }
    ]
}


14. Install x-debug in your server or virtual machine (For CentOS 7).
For example, if you use IUS repository:
$ sudo rpm -Uvh https://dl.fedoraproject.org/pub/epel/epel-release-latest-7.noarch.rpm
$ sudo yum install https://centos7.iuscommunity.org/ius-release.rpm

If you already have repositories (like Remi, webtatic), you don't need to add these repositories.

If you are using IUS repository:
Please note this is a xdebug for PHP7.1.
$ sudo yum -y install php71u-pecl-xdebug

And open your xdebug.ini:
$ sudo vi /etc/php.d/xdebug.ini

Or probably:
$ sudo vi /etc/php.d/15-xdebug.ini

And add these lines in the file:
[xdebug]
xdebug.default_enable = 1
xdebug.idekey = "vscode"
xdebug.remote_enable = 1
xdebug.remote_port=9000
xdebug.remote_autostart=1
xdebug.remote_host=192.168.10.100 #Your host PC's IP here! Not guest machine's IP!

(Press a on your keyboard to go into insert mode, then you can edit the file. Press escape key to stop the insert mode. After stopping the insert mode, press shift key + g to go to the lowest row. Shift + zz or :wq to save and close the file. You can go to command mode by pressing : on your keyboard. To save and quit by the command mode, input :wq and enter. To exit the file without saving the file, inout :q! and enter. To search a word, press ? then write a word what you want to search. For example, if you write ?aaa and press enter, "aaa" is searched and highlighted in the file. Press n to jump to next match.)

Save and close it with a command ":wq".

15.  Restart Apache.
Run this command:
$ sudo service httpd restart

Now your x-debug should work.

16. Choose "Listen for Xdebug" from the debug menu. Then click the play button from the menu. If you are asked by windows if it is ok to allow access, answer yes.

Write as follows in php file and save it as phpinfo.php in the vagrant shared folder:
<?php
phpinfo();
?>
Check if it can be seen from browser. If it can, open it from Visual Studio Code.

Add some breakpoints:

Then reload the page from your browser:

You can see that xdebug is working.

Dialog window example using jQuery and jQuery UI

Click this button and dialog will appear:


Code:
<button onclick="open_dialog()">Click here for the dialog</button>
<div id="dialog" title="Dialog" style="display:none;">
<p>Hello People.</p>
</div>
<script src="http://ajax.googleapis.com/ajax/libs/jquery/1.11.1/jquery.min.js"></script>
<script src="http://ajax.googleapis.com/ajax/libs/jqueryui/1.12.1/jquery-ui.min.js"></script>
<link rel="stylesheet" href="http://ajax.googleapis.com/ajax/libs/jqueryui/1.12.1/themes/base/jquery-ui.css"></link>
<script>
    dialog = $("#dialog").dialog({
        autoOpen: false,
        //Use the following line to hide the x button to close.
        open:function(event,ui){
                //Hiding the title bar
                $(".ui-dialog-titlebar").hide();
                $(".ui-dialog-titlebar-close").hide();
                //Binding close
                $('.ui-widget-overlay').on('click',function(){
                        dialog.dialog('close');
                });
        },
        modal: true,
        closeOnEscape: true,
        draggable: false,
        width: "50%",
        show: "fade",
        hide: "fade",
        buttons:{
            "Do something":function(){
                $(this).dialog('close');
            },
            //Use the following to add a new button.
            /*"Close":function(){
                $(this).dialog('close');
            }*/
        }
    });
    function open_dialog(){
        dialog.dialog('open');
    }
</script>

Sunday, August 13, 2017

Install Keras and test deep learning

Deep Learning

Preparation
1.  Virtual box and Vagrant

2.  Install Apache

3.  Install MySQL

4.  Install Python

5.  Hello World with Python

Deep learning programming
1. Install Keras and test deep learning

2. Save learned parameters and load the parameters

3. Save and load at a same time

4. Use own dataset

Install Keras and test deep learning


At first, we need to install Keras.
If your PC has GPU:
$ python3.6 -m pip install tensorflow-gpu
$ python3.6 -m pip install keras
(If your pc has nvidia gpu, you need cuda for tesnforflow. Install it from here like this: $ sudo apt-get install cuda-9.0)

If your PC doesn't have GPU:
$ python3.6 -m pip install tensorflow
$ python3.6 -m pip install keras

And matplotlib to visualize the learning.
$ sudo yum -y install gcc gcc-c++ kernel-devel
$ sudo yum -y install python-devel libxslt-devel libffi-devel openssl-devel
$ python3.6 -m pip install matplotlib

h5py also. This is to save the model.
$ python3.6 -m pip install h5py

Write code like this
#!/usr/bin/env python
# -*- coding: UTF-8 -*-

from keras.datasets import mnist
from keras.models import Sequential
from keras.layers.core import Dense, Activation
from keras.utils import np_utils

# Get the default MNIST data
(X_train, y_train), (X_test, y_test) = mnist.load_data()

X_train = X_train.reshape(60000, 784) / 255
X_test = X_test.reshape(10000, 784) / 255

y_train = np_utils.to_categorical(y_train)
y_test = np_utils.to_categorical(y_test)

# Network
model = Sequential([
        Dense(512, input_shape=(784,)),
        Activation('sigmoid'),
        Dense(10),
        Activation('softmax')
    ])

# Compile
model.compile(loss='categorical_crossentropy', optimizer='sgd', metrics=['accuracy'])

# Learning
model.fit(X_train, y_train, batch_size=200, verbose=1, epochs=20, validation_split=0.1)

# Forecast
score = model.evaluate(X_test, y_test, verbose=1)
print('test accuracy : ', score[1])

And save it as "dplrn.py" in the shared folder.

Then we will execute it as follows:
$ python3.6 /vagrant/dplrn.py

Then deep learning starts:

And in the end, the test accuracy is displayed:


Seems like my AI's test accuracy is about 89%. wow :)

Other examples can be found here.

Friday, August 11, 2017

Change version of "python" and "pip" command

If you want use Python3.5 with a command "python", we need to create "symbolic link" for python3.5. We will check the directory of Python:

$ sudo ls -l /bin/py*

And we will change those symbolic links:

$ sudo ln -s /bin/python3.5 /bin/python3 
$ sudo unlink /bin/python 
$ sudo ln -s /bin/python3 /bin/python

pip also.

$ sudo ln -s /bin/pip3.5 /bin/pip

And it's done!

Deploy cakephp

Look at "webroot" folder. webroot folder should be at the top directory of CakePHP.


This is the only folder users need to access. Users don't need to access other folders because other folders are used indirectly to make the web app work. We have created template files and these template files are indirectly accessed through the index.php in this webroot folder.
webroot folder -> Should be accessible by users.
other folders -> Should not be accessible by users.
So, to deploy the cakephp webapp, upload all of the files of cakephp to the server. Set permission accordingly and maybe change DorumentRoot of apache (in httpd.conf) to

DocumentRoot "/var/www/html/cake/webroot"

so that the webroot folder is used as index of the server.

Thursday, August 10, 2017

Not encoded for chrome browser?

URL not encoded?


The other day, I tried to encode a URL by javascript functions: encodeURI and encodeURIcomponent.
What I did was encoding like this:
//Encode the URL. "Rhône" in the URL should be encoded.
$link = encodeURI("https://en.wikipedia.org/wiki/Rhône_(department)");
//Then jump to the URL.
location.href = $link;

But the result was like this:
Seems like not encoded at all???

So I tried other link also. The query should be encoded.
link = "https://www.google.com/search";
//Encode the query. "ÀàÇç???&&&" should be encoded.
query = "?q=" + encodeURIComponent("ÀàÇç???&&&");
//Then jump to the URL.
location.href = link+query;

The result was:

???&&&  was encoded but Ã€Ã Ã‡Ã§ was not encoded. Why is that?

This is because Chrome and Firefox use Unicode, which is a kind of UTF8, in its source code, so the URL is automatically changed to UTF8. This behavior is as per the spec. Also, this means you can use UTF8 letters in Chrome's and Firefox's URL, so even if Ã€Ã Ã‡Ã§  is not encoded for Chrome, it is not a problem.

If you really want to make the UTF8 letters encoded also, encode the URL twice. (Actually I think it is pointless to force encoding such letters also though...)
link = "https://www.google.com/search";
query = "?q=" + encodeURIComponent(encodeURIComponent("ÀàÇç???&&&"));
location.href = link+query;

It's encoded now:

If you decode the query after receiving it, you can get the original query. Maybe use PHP or something to receive and decode the query.

I tried to decode the query by javascript as a test.
query = "%C3%80%C3%A0%C3%87%C3%A7%3F%3F%3F%26%26%26";
console.log(decodeURIComponent(query));

Console log:


Chrome developer tool too?


I used "htmlspecialchars" function in PHP the other day.
<?php
echo htmlspecialchars("#$?&%'");
?>

I expected the symbols to be escaped and I checked them by Chrome's developer tool. But the result was:
Why aren't they escaped???

This is because Chrome's developer tool displays actual letters (DOM tree, not code as it is), so the escaped characters are also displayed after being changed to readable letters. If you check the letters with IDE like visual studio code, you can see that it is actually escaped.

Related Google group's link: https://groups.google.com/forum/#!topic/google-chrome-developer-tools/tb-8fbgNkCU


Wednesday, August 9, 2017

Cakephp: add a ctp file without controller

In CakePHP, usually, if you want to create a new page, you need to make its controller at first.
But if you use PagesController, you can add a ctp file super easily.

At first, create ctp file under \src\Template/Pages folder.

I created a test.ctp file under \src\Template/Pages.

Inside the file is:
<h1>Hello This is a test</h1>

Now you can access the file from browser without modifying controller or model. This is because Pages controller has a special function to display the ctp file.


The display function in PagesController. All you have to do is designate the file name.

Add a calendar page

CakePHP
1. Setting up CakePHP3 with CentOS

2. Bake and Migration


4. Add a calendar page

5. Use "contain"

6. Use find('list')

Introduction


Last time, we used "bake" command to add a page, but this time, we will add a page without using "bake" command. bake command is easy and very quick to create various pages and functions, but if you need to adjust details of the pages, sometimes it is better to manually create pages without bake command so that you can decide every behavior by yourself.

In cakephp, to add a page, you need 2 or 3 files: controller, view (template) and probably a model (table) file if you want to use database for the page.

As a practice, we will add a calendar page in this post.

Database

Do the following commands to create a migration file:
$ cd /vagrant/cake
$ bin/cake bake migration CreateProducts name:string description:text created modified

Then do migrate the file:
$ bin/cake migrations migrate

You have the necessary table in the database now.

Model


Create the model for calendars.
$ bin/cake bake model Calendars

Now you have an entity file for calendars in cake/src/Model/Entity and a table file in cake/src/Model/Table.

Controller


At first, we will create the controller. The directory is something like this: C:\MyVM\MyCentOS\cake\src\Controller.
To create a php file, just create a txt file and change it to php file.


Then open the CalendarsController.php. Write like this in the php file:
<?php
namespace App\Controller;

use App\Controller\AppController;

class CalendarsController extends AppController
{
    public function index()
    {
        //Do nothing. Just simply display.
    }
}

Then save and close it.

View


Now we will create a view. Open "Template" foler which exists under cake/src. The directory should be something like this: C:\MyVM\MyCentOS\cake\src\Template
Then create a "Calendars" folder in the Template folder. In this folder, we will store our views for the calendar pages.


 Open the Calendars folder and create a "index.ctp".


Open the index.ctp and write like this:
<h1>Calendar</h1>
<p>This page is made to display calendar.</p>
And save and close it.

Now access the index page from the browser. The file can be accessed by yourURL/calendar/index. Or if you just access yourURL/calendar, the index page is automatically displayed. My URL is http://192.168.33.10/cake/, so the calendar page can be accessed from either http://192.168.33.10/cake/calendar or http://192.168.33.10/cake/calendar/index.

New page is added!

Calendar Helper


Now we will create a calendar view to display a calendar. Create a CalendarsHelper.php in Helper folder. The directory should be something like this: C:\MyVM\MyCentOS\cake\src\View\Helper


Open the CalendarsHelper.php and write like this inside:
<?php
namespace App\View\Helper;

use Cake\View\Helper;

class CalendarsHelper extends Helper {

   public function makeCalendar($month, $year, $eventArray=[]){
        $days = cal_days_in_month(CAL_GREGORIAN, $month, $year);
        $weekDayArray = ["0"=>"Sun", "1"=>"Mon", "2"=>"Tue", "3"=>"Wed", "4"=>"Thu", "5"=>"Fri", "6"=>"Sat"];
    
        echo "<table class='calendar'><tr>";
        for($i=0;$i<7;$i++){
             echo "<td class='weekdays'>".$weekDayArray[$i]."</td>";
        }
        echo "</tr><tr>";
    
        $firstdate = $year.'-'.$this->startWithZero($month).'-01';
        $firstDaysWeekDay = $this->getWeekday($firstdate);
        $weekdaynum = 0;
        for($i=1,$j=1;$j<=$days;$i++){
            if($i<8){
                if($firstDaysWeekDay <= $i-1){
                    $event = $this->setEvent($eventArray, $j);
                    echo "<td>".$j.$event."</td>";
                    if($i-1 === 6){
                        echo "</tr><tr>";
                    }
                    $j++;
                    continue;
                }else{
                    echo "<td></td>";
                    continue;
                }
            }else{
                $event = $this->setEvent($eventArray, $j);
                echo "<td>".$j.$event."</td>";
                $weekdaynum++;
                $j++;
            }
            if($weekdaynum%7===0) echo "</tr><tr>";
        }
        echo "</tr></table>";
    }

    private function getWeekday($date) {
        return date('w', strtotime($date));
    }

    private function startWithZero($num){
        if(is_numeric($num) && strlen($num) < 2){
            return "0".$num;               
        }else{
            return $num;       
        }
    }
 
    private function setEvent($eventArray, $j){
        $event = "";
        if(isset($eventArray[$this->startWithZero($j)])){
            if(is_array($eventArray[$this->startWithZero($j)])){
                foreach($eventArray[$this->startWithZero($j)] as $value){
                    $link = ''; //Link for each events here.
                    $eventdetail = isset($value['event']) ? $value['event'] : '';
                    $class = isset($value['eventClassName']) ? 'class="'.$value['eventClassName'].'"' : '';
                    $id = isset($value['id']) ? 'id="'.$value['id'].'"' : '';
                    $event .= "<div class='event-wrapper'><a ".$id." ".$class." href='".$link."'>".$eventdetail."</a></div>";
                }
            }
        }
        return $event;
    }

}
?>
Save and close it.

Now you can use this helper in the Template files.

Call view helper in template file


Open the index.ctp of Calendar. The directory should be something like C:\MyVM\MyCentOS\cake\src\Template\Calendar\index.ctp

<h1>Calendar</h1>
<p>This page is made to display calendar.</p>
<?php $this->Calendar->makeCalendar(7, 2017); ?>

Save and close it. Now see the /cake/calendar/index from browser again.
Calendar for July 2017 is displayed.

Now open the index.ctp of Calendar again and modify it like this.
<h1>Calendar</h1>
<p>This page is made to display calendar.</p>
<?php echo '<span class="text-center"><p>Today:'. Date('d/m/Y').'</p></span>';
$this->Calendar->makeCalendar(Date('m'), Date('Y')); ?>
Date('Y') and Date('m') always shows current date's year and month, so the CalendarsHelper's arguments always become current date. So the calendar also always become current year and current month's calendar. Date('d/m/Y') always shows current date with "dd/mm/YYYY" format.
The modified calendar page is below:


Modify Model

Entity and Virtual fields


Open the Entity folder. The directory should be something like this: C:\MyVM\MyCentOs\cake\src\Model\Entity
The entity file of Calendars is Calendar.php. Open this file.
In "Calendar.php", write as follows, and save and close it.

<?php
namespace App\Model\Entity;

use Cake\ORM\Entity;
use Cake\I18n\Date;

class Calendars extends Entity
{
    protected $_accessible = [
        'date' => true,
        'event' => true,
        'detail' => true,
        'created' => true,
        'modified' => true
    ];

    protected function _getYear() //Virtual field
    {
        $date = new Date($this->_properties['date']);
        $year = $date->format('Y');
        return $year;
    }

    protected function _getMonth() //Virtual field
    {
        $date = new Date($this->_properties['date']);
        $month = $date->format('m');
        return $month;
    }

    protected function _getDay() //Virtual field
    {
        $date = new Date($this->_properties['date']);
        $day = $date->format('d');
        return $day;
    }
}

These blue functions (_getYear, _getMonth, _getDay) are called "virtual field". If you want to modify data fetched from the database before rendering ctp files, you can make virtual fields in Entity file and in the virtual field functions, you modify the fetched data. These modified data can be treated as if they were fields fetched from the database. In other words, "year", "month" and "day" field will be added to the available fields in .ctp view files.

By the way, to deal with date type data in php, you can also use strtotime() function. This function is useful.


Modify Table and Controller, then create "add.ctp"


Open the CalendarsTable.php and write as follows. And save and close it.

<?php
namespace App\Model\Table;

use Cake\ORM\Query;
use Cake\ORM\RulesChecker;
use Cake\ORM\Table;
use Cake\Validation\Validator;

class CalendarsTable extends Table
{

    /**
     * Initialize method
     *
     * @param array $config The configuration for the Table.
     * @return void
     */
    public function initialize(array $config)
    {
        parent::initialize($config);

        $this->setTable('calendars');
        $this->setDisplayField('id');
        $this->setPrimaryKey('id');

        $this->addBehavior('Timestamp');
    }

    /**
     * Default validation rules.
     *
     * @param \Cake\Validation\Validator $validator Validator instance.
     * @return \Cake\Validation\Validator
     */
    public function validationDefault(Validator $validator)
    {
        $validator
            ->integer('id')
            ->allowEmpty('id', 'create');

        $validator
            ->dateTime('date')
            ->requirePresence('date', 'create')
            ->notEmpty('date');

        $validator
            ->scalar('event')
            ->requirePresence('event', 'create')
            ->notEmpty('event');

        $validator
            ->scalar('detail')
            ->requirePresence('detail', 'create')
            ->notEmpty('detail');

        $validator //Add this validator!
            ->notEmpty('date', 'Date is required')
            ->notEmpty('event', 'An event is required');

        return $validator;
    }
}


Open CalendarsController.php and write as follows. Save and close it.

<?php
namespace App\Controller;
use App\Controller\AppController;

class CalendarsController extends AppController
{
    public function index()
    {
        $calendars= $this->paginate($this->Calendars);
        $this->set(compact('calendars'));
    }

    public function add()
    {
        $calendars = $this->Calendars->newEntity();
        if ($this->request->is('post')) {
            $calendars = $this->Calendars->patchEntity($calendars, $this->request->getData());
            if ($this->Calendars->save($calendars)) {
                $this->Flash->success(__('The event has been saved in the calendar.'));

                return $this->redirect(['action' => 'index']);
            }
            $this->Flash->error(__('The event could not be saved. Please, try again.'));
        }
        $this->set(compact('calendars'));
        $this->set('_serialize', ['calendars']);
    }
}

Open the template folder of Calendars: C:\MyVM\MyCentOS\cake\src\Template\Calendars
And add "add.ctp" in the folder and write as follows in the file. Then save and close it.

<?php
/**
  * @var \App\View\AppView $this
  */
?>
<nav class="large-3 medium-4 columns" id="actions-sidebar">
    <ul class="side-nav">
        <li class="heading"><?= __('Actions') ?></li>
        <li><?= $this->Html->link(__('See Calendar'), ['action' => 'index']) ?></li>
        <li><?= $this->Html->link(__('Add Event in Calendar'), ['action' => 'add']) ?></li>
    </ul>
</nav>
<div class="calendar form large-9 medium-8 columns content">
    <?= $this->Form->create($calendars) ?>
    <fieldset>
        <legend><?= __('Add Calendar') ?></legend>
        <?php
            echo $this->Form->control('date',['minYear'=>Date('Y')-100,'maxYear'=>Date('Y')+5]);
            echo $this->Form->control('event');
            echo $this->Form->control('detail');
        ?>
    </fieldset>
    <?= $this->Form->button(__('Submit')) ?>
    <?= $this->Form->end() ?>
</div>

Open the template folder of Calendars and open the index.ctp. And change it as follows:

<h1>Calendar</h1>
<p>This page is made to display calendar.</p>
<?php echo '<span class="text-center"><p>Today:'. Date('d/m/Y').'</p></span>';
$events = array();
foreach ($calendars as $c):
    $events[$c->day][] = ['event'=>$c->event];
endforeach;
$this->Calendars->makeCalendar(Date('m'), Date('Y'), $events); ?>

Blue property day is the virtual field defined in the Entity file.

Test the calendar


Now add an event from http://192.168.33.10/cake/calendar/add


And you will see an event is added in the calendar.