Sunday, April 29, 2018

How to use Tensorboard

1. How to use Tensorflow Object Detection API
2. How to train for Tensorflow Object Detection API
3. How to use Tensorboard
4. How to use a trained model of TF Detect in Android

We trained a model in this post: How to train for Tensorflow Object Detection API
Now we will visualize how it was trained.

Run this command:
$ cd $HOME/Documents/
$ git clone https://github.com/tensorflow/tensorflow
$ cd $HOME/Documents/tensorflow
$ python3.6 -m tensorboard.main --logdir=$HOME/Documents/workspace/tf
*Use your training directory for the logdir argument.
*You need to be inside tensorflow's project directory.

You will see this message.

And go to the link provided by the tensorboard.

You can access the link from your browser (like Chrome, Firefox)
This is the Tensorboard.


Sunday, April 22, 2018

How to train for Tensorflow Object Detection API

1. How to use Tensorflow Object Detection API
2. How to train for Tensorflow Object Detection API
3. How to use Tensorboard
4. How to use a trained model of TF Detect in Android

At first, you need tensorflow1.7.0 and cuda9.0. Make sure you have both of them.

Make own dataset


Now you need a dataset. I prepared 120  pictures of Thora Birch:

From these pictures, we will make a dataset. We will use labelImg to define where is what.
$ git clone https://github.com/tzutalin/labelImg.git
$ cd labelImg
$ python3.6 labelImg.py

labelImg will open. Select "Open Dir".

Choose the thora folder.

Opened.

From the top of window, "Edit" -> "Create Rectbox". And create a rectangle box on her face. The category name is "thora".

Then save it. It is saved as (picture name).xml. Create rectbox on fer faces of other 119 pictures.

Make folders for tensorflow training: ckpt, info, input, label, val_input. val_label.
(dataset folder will be made later)

We need .record file to make a model of tensorflow object detection API, so we will use "racoon_dataset" to create the file. Clone the project to your local.
$ git clone https://github.com/datitran/raccoon_dataset
$ mv ./raccoon_dataset ./dataset
$ cd ./dataset

Now you have a dataset directory. See inside:
(I deleted test files because they seemed unnecessary)

Remove all files from "data", "training" and "images".

Move all pictures you have to the "images" folder.

Move all of the .xml files, that were made by labelImg, to "annotations" folder.

Open "xml_to_csv.py" and change the name of generated csv file.


It's time to change the pictures/xmls to a csv file. Run this command:
$ python3.6 xml_to_csv.py

You should have got a csv in the current folder:

Move it to data folder:


We will convert the csv to record file of tensorflow.
Open the "generate_tfrecord.py" and change the file this way:

Then save the file.

Run the following command:
$ python3.6 generate_tfrecord.py

This will generate "thora.record" file (which is tensorflow record file).
Copy the thora.record and paste it in "input" and "val_input" folders.


Then record files are ready.

Now we will make .pbtxt files to define labels. Make "label.pbtxt" in "label" and "val_label" folders. Code written inside of the .pbtxt files is same. Write as follows in both of the files:
item {
  id: 1
  name: 'thora'
}
(id:0 is a placeholder, so you always need to start with "id:1")
Examples of label list.

Config file


Create a "tf.config" text file.


You can see sample files here. I used "ssd_mobilenet_v1_pets.config" and customized the sample config file a bit. (I'm not sure if this is a right choice though.)

Search with "PATH_TO_BE_CONFIGURED"

Then configure the value:

Also maybe you need to decrease the number of steps executed for training. 200k would be too much for a test.


Also change the num of classes to 1. Because we have only thora class except others class.


If you download a pre-trained model here, you can use it for fine-tuning. I used "ssd_mobilenet_v1_coco_11_06_2017" for fine-tuning:

Start training


See here about the command to start training/evaluating. (We cloned the tensorflow object detection API project in Documents directory.) I used this command to start training:
$ cd $HOME/Documents/models/research
$ python3.6 object_detection/train.py --logtostderr --pipeline_config_path=$HOME/Documents/workspace/tf/tf.config --train_dir=$HOME/Documents/workspace/tf


Training.


I checked if my model works.


Export a trained model


To use the model for mobile app, we need to export the model and make .pb file.

See here for the command. It's like this:
# From tensorflow/models/research/
python object_detection/export_inference_graph.py \
    --input_type image_tensor \
    --pipeline_config_path ${PIPELINE_CONFIG_PATH} \
    --trained_checkpoint_prefix ${TRAIN_PATH} \
    --output_directory output_inference_graph.pb

For example:
$ cd  ~/Documents/models/research
$ python3.6 object_detection/export_inference_graph.py --input_type image_tensor --pipeline_config_path $HOME/Documents/workspace/tf/pipeline.config --trained_checkpoint_prefix $HOME/Documents/workspace/tf/model.ckpt-100 --output_directory $HOME/Documents/workspace/tf/data/output_inference_graph

Optimization


Note: as of April 2018, if you optimize tf detect model, it doesn't work properly.

Use optimization_for_inference.py to optimize the .pb file. You can find it in tensorflow project:
https://github.com/tensorflow/tensorflow/blob/master/tensorflow/python/tools/optimize_for_inference.py

You need bazel for the command:
https://docs.bazel.build/versions/master/install.html

According to the tensorflow page, if we suppose you cloned tensorflow in Documents directory, an example of command-line usage is:
$ cd $HOME/Documents
$ bazel build tensorflow/python/tools:optimize_for_inference && \
$ bazel-bin/tensorflow/python/tools/optimize_for_inference \
--input=frozen_inception_graph.pb \
--output=optimized_inception_graph.pb \
--frozen_graph=True \
--input_names=Mul \
--output_names=softmax
Note: you need to check what the output/input node names are by summarize_graph tool and provide them as input_names/output_names of the arguments of optimize_for_inference tool.
For my model, the input name was "image_tensor", and the output node name was "detection_boxes, detection_scores, detection_classes, num_detections" (4 outputs).

Suppose you cloned tensorflow in Documents directory, summarize_graph tool can be used like this:
$ cd $HOME/Documents
$ bazel build tensorflow/tools/graph_transforms:summarize_graph
$ bazel-bin/tensorflow/tools/graph_transforms/summarize_graph --in_graph=tensorflow_inception_graph.pb

See also:
https://github.com/tensorflow/models/issues/2283
https://stackoverflow.com/questions/41265035/tensorflow-why-there-are-3-files-after-saving-the-model
https://stackoverflow.com/questions/40028175/how-do-you-get-the-name-of-the-tensorflow-output-nodes-in-a-keras-model
How to use SSD: Single Shot MultiBox Detector
Use keras' Classifier model on android app

references:
https://towardsdatascience.com/how-to-train-your-own-object-detector-with-tensorflows-object-detector-api-bec72ecfe1d9


Saturday, April 14, 2018

Prediction of stockprice (training a model)

This is just a project for a practice to learn DeepLearning. This is predicting based only on previous 10 closing prices. It is highly possible that the information (columns of dataset) to predict is not enough and the prediction is not precise.

1. Prediction of stockprice (Training a model)
2. Prediction of stockprice (Prediction by CSV)
3. Prediction of stockprice with trained weight with Google API


Save the code shown below as stockprice.py and use it this way:
$ python3.5 stockprice.py location/of/your_csv.csv
You can specify a file or a folder path. If it is a file, it trains the model based on the single csv file. If it is a folder, it puts together all the csv files in the folder, and train the model based on the csv files.
You can download csv of stock price from Yahoo finance.

The code:
#-*- coding: utf-8 -*-
import numpy
import pandas
import matplotlib.pyplot as plt
import sys
from pathlib import Path
from keras.models import load_model
from sklearn.preprocessing import StandardScaler
from keras.models import Sequential
from keras.models import model_from_json
from keras.layers.core import Dense, Activation, Dropout
from keras.layers.noise import AlphaDropout
from keras.layers.recurrent import LSTM
import keras.backend.tensorflow_backend as KTF
import os.path

class Prediction :

  def __init__(self):
    self.length_of_sequences = 10
    self.in_out_neurons = 1
    self.hidden_neurons = 600


  def load_data(self, data, n_prev=10):
    X, Y = [], []
    for i in range(len(data) - n_prev):
      X.append(data.iloc[i:(i+n_prev)].as_matrix())
      Y.append(data.iloc[i+n_prev].as_matrix())
    retX = numpy.array(X)
    retY = numpy.array(Y)
    return retX, retY


  def create_model(self, f_model, model_filename) :
    print(os.path.join(f_model,model_filename))
    if os.path.isfile(os.path.join(f_model,model_filename)):
      print('Saved parameters found. I will use this file...')
      model = load_model(os.path.join(f_model,model_filename))
    else:
      print('Saved parameters Not found. Creating new one...')
      model = Sequential()
      model.add(LSTM(self.hidden_neurons, \
              batch_input_shape=(None, self.length_of_sequences, self.in_out_neurons), \
              return_sequences=False))
      model.add(Dense(self.in_out_neurons))
      model.add(Activation("linear"))
      model.compile(loss="mape", optimizer="adam")
    return model

  def train(self, f_model, model_filename, X_train, y_train) :
    model = self.create_model(f_model, model_filename)
    # Learn
    model.fit(X_train, y_train, batch_size=10, epochs=20)
    return model


if __name__ == "__main__":

  f_log = './'
  f_model = './'
  model_filename = 'stockprice_model.hdf5'

  prediction = Prediction()

  # Data
  data = None
  try:
    csv_loc = str(sys.argv[1])
  except NameError:
    print("Please give a location of the csv file.")
  if(csv_loc == ""):
    print("Please give a location of the csv file.")
  print(csv_loc)
  if(os.path.isfile(csv_loc)):
    data_ = pandas.read_csv(csv_loc)
    data = data_ if (data is None) else pandas.concat([data, data_])
  elif(os.path.isdir(csv_loc)):
    pathlist = Path(csv_loc).glob('**/*.csv')
    for path in pathlist:
      # because path is object not string
      path_in_str = str(path)
      data_ = pandas.read_csv(path_in_str)
      data = data_ if (data is None) else pandas.concat([data, data_])
  else:
    print("This is not a file nor a folder.")

  data = pandas.read_csv(csv_loc)
  data = data.drop('Volume',axis=1)
  data = data.drop('Adj Close',axis=1)

  data.columns = ['Date', 'Open', 'High', 'Low', 'Close']
  data['Date'] = pandas.to_datetime(data['Date'], format='%Y-%m-%d')
  # Data of closing price
  scaler = StandardScaler()
  scaler.fit(data[['Close']])
  data['Close'] = scaler.transform(data[['Close']])
  data = data.sort_values(by='Date')
  data = data.reset_index(drop=True)
  data = data.loc[:, ['Date', 'Close']]

  # 10% of the data is used as test data.
  split_pos = int(len(data) * 0.9)
  x_train, y_train = prediction.load_data(data[['Close']].iloc[0:split_pos], prediction.length_of_sequences)
  x_test,  y_test  = prediction.load_data(data[['Close']].iloc[split_pos:], prediction.length_of_sequences)

  model = prediction.train(f_model, model_filename, x_train, y_train)

  predicted = model.predict(x_test)
  print('save weights')
  model.save(os.path.join(f_model,model_filename))
  result = pandas.DataFrame(scaler.inverse_transform(predicted))
  result.columns = ['predict']
  result['actual'] = scaler.inverse_transform(y_test)
  result.plot()
  plt.show()

Sunday, April 8, 2018

Prediction of stockprice with trained weight with Google API

This is just a project for a practice. This is predicting based only on previous 10 closing prices. It is highly possible that the information (columns of dataset) to predict is not enough and the prediction is not precise.

1. Prediction of stockprice (Training a model)
2. Prediction of stockprice (Prediction by CSV)
3. Prediction of stockprice with trained weight with Google API

At first, install google API like this:
$ pip install googlefinance.client
Also you need a trained weight file. See Prediction of stockprice (Training a model) .

If you want trained weight and model:
https://www.dropbox.com/s/cepuxsgxj90kuqa/stockprice_model.hdf5?dl=0

Please note that it is predicting next closing price.

This predicts today's stock price. The code:
#-*- coding: utf-8 -*-
import numpy
import pandas
import matplotlib.pyplot as plt
from decimal import *

from keras.models import load_model
from sklearn import preprocessing
from sklearn.preprocessing import StandardScaler
from keras.models import Sequential
from keras.models import model_from_json
from keras.layers.core import Dense, Activation
from keras.layers.recurrent import LSTM
import keras.backend.tensorflow_backend as KTF
import os.path
from googlefinance.client import get_price_data, get_prices_data, get_prices_time_data

class Prediction :
 
  def load_data(self, data):
    X = []
    X.append(data.iloc[0:10].as_matrix())
    #Y.append(data.iloc[i+n_prev].as_matrix())
    retX = numpy.array(X)
    #retY = numpy.array(Y)
    return retX
 
  def validate_data(self, data):
    if(len(data.index) > 10):
      data = data.drop(data.index[0])
      data = data.reset_index(drop=True)
    return data

  def create_model(self, f_model, model_filename):
    print(os.path.join(f_model,model_filename))
    if os.path.isfile(os.path.join(f_model,model_filename)):
      print('Saved parameters found. I will use this file...')
      model = load_model(os.path.join(f_model,model_filename))
    else:
      print('Saved parameters weren\'t found')
      return
    return model
 
if __name__ == "__main__":

  f_log = './'
  f_model = './'
  model_filename = 'stockprice_model.hdf5'

  prediction = Prediction()

  # Data
  # S&P 500 Index
  param = {
    'q': ".INX", # Stock symbol (ex: "AAPL")
    'i': "86400", # Interval size in seconds ("86400" = 1 day intervals)
    'x': "INDEXSP", # Stock exchange symbol on which stock is traded (ex: "NASD")
    'p': "11d" # Period (Ex: "1d" = 1 day)
  }
  data = get_price_data(param)
  data = data.drop('Volume',axis=1)
  data = data.reset_index()
  data = prediction.validate_data(data)
  print(data)
  #data = None
  #data_ = pandas.read_csv('./csv/%s' % (prediction.csv))
  #data = data_ if (data is None) else pandas.concat([data, data_])

  data.columns = ['Date', 'Open', 'High', 'Low', 'Close']
  data['Date'] = pandas.to_datetime(data['Date'], format='%Y-%m-%d')
  # Data of closing price
  scaler = StandardScaler()
  scaler.fit(data[['Close']])
  data['Close'] = scaler.transform(data[['Close']])
  data = data.sort_values(by='Date')
  data = data.reset_index(drop=True)
  data = data.loc[:, ['Date', 'Close']]

  x_test = prediction.load_data(data[['Close']])

  model = prediction.create_model(f_model, model_filename)

  predicted = model.predict(x_test, verbose=1)
  print("Next stock price is predicted to be: " + str(float(scaler.inverse_transform(predicted))))


Prediction of stockprice using trained weight

This is just a project for a practice. This is predicting based only on previous 10 closing prices. It is highly possible that the information (columns of dataset) to predict is not enough and the prediction is not precise.

1. Prediction of stockprice (Training a model)
2. Prediction of stockprice (Prediction by CSV)
3. Prediction of stockprice with trained weight with Google API

Save the code below as "predict.py".
And use this code to predict the stockprice like this (You need 10 rows of data in CSV. This predicts 11th data.) :
$ python3.5 predict.py location/of/your_csv.csv

The code:
#-*- coding: utf-8 -*-
import numpy
import pandas
import matplotlib.pyplot as plt
from decimal import *
import sys
from keras.models import load_model
from sklearn import preprocessing
from sklearn.preprocessing import StandardScaler
from keras.models import Sequential
from keras.models import model_from_json
from keras.layers.core import Dense, Activation
from keras.layers.recurrent import LSTM
import keras.backend.tensorflow_backend as KTF
import os.path
from datetime import datetime, timedelta

class Prediction :

  def load_data(self, data, scaler):
    # Data of closing price
    scaler.fit(data[['Close']])
    price_data = data[['Close']]
    data['Close'] = scaler.transform(data[['Close']])
    data = data.sort_values(by='Date')
    data = data.reset_index(drop=True)
    data = data.loc[:, ['Date', 'Close']]

    X, Y = [], []
    Dates = []
    Prices = []
    close_data = data[['Close']]
    date_data = data[['Date']]
    for i in range(len(close_data) - 10):
      if i+11 < len(close_data):
        Dates.append(date_data.iloc[[i+11]].iloc[0]['Date'])
        Prices.append(price_data.iloc[[i+11]].iloc[0]['Close'])
      else:
        Dates.append(date_data.iloc[[i+10]].iloc[0]['Date']+timedelta(days=1))
        Prices.append('Not applicable.')
      X.append(close_data.iloc[i:(i+10)].as_matrix())
      Y.append(close_data.iloc[i+10].as_matrix())
    retX = numpy.array(X)
    retY = numpy.array(Y)
    return retX, retY, Dates, Prices


  def create_model(self, f_model, model_filename):
    print(os.path.join(f_model,model_filename))
    if os.path.isfile(os.path.join(f_model,model_filename)):
      print('Saved parameters found. I will use this file...')
      model = load_model(os.path.join(f_model,model_filename))
    else:
      print('Saved parameters weren\'t found')
      return
    return model

if __name__ == "__main__":

  f_log = './'
  f_model = './'
  model_filename = 'stockprice_model.hdf5'

  prediction = Prediction()

  # Data
  data = None
  try:
    csv_loc = str(sys.argv[1])
  except NameError:
    print("Please give a location of the csv file.")
  if(csv_loc == ""):
    print("Please give a location of the csv file.")
  print(csv_loc)
  data = pandas.read_csv(csv_loc)
  data = data.drop('Volume',axis=1)
  data = data.drop('Adj Close',axis=1)

  data.columns = ['Date', 'Open', 'High', 'Low', 'Close']
  data['Date'] = pandas.to_datetime(data['Date'])
  print(data)
  scaler = StandardScaler()
  x_test, y_test,  Dates, Prices = prediction.load_data(data, scaler)

  model = prediction.create_model(f_model, model_filename)

  predicted = model.predict(x_test, verbose=1)
  FalseResult = 0
  TrueResult = 0
  for idx,p in enumerate(predicted):
    print('Date:' + str(Dates[idx].year) + '/' + str(Dates[idx].month) + '/' + str(Dates[idx].day) + ', Closing price (Predicted): '+ str(float(scaler.inverse_transform(p))))
    print('Date:' + str(Dates[idx].year) + '/' + str(Dates[idx].month) + '/' + str(Dates[idx].day) + ', Closing price (Actual): '+ str(Prices[idx]))
    dif1 = 0
    dif2 = 0
    dif3 = 0
    was_high_low_correct = False
    if idx > 0 and not isinstance(Prices[idx], str) :
      dif1 = float(scaler.inverse_transform(p)) - float(Prices[idx])
      dif2 = float(Prices[idx-1]) - float(Prices[idx])
      dif3 = float(Prices[idx-1]) - float(scaler.inverse_transform(p))
      if (dif2 < 0 and dif3 < 0) or (dif2 > 0 and dif3 > 0) or (dif2 == 0 and dif3 == 0):
        was_high_low_correct = True
    else:
      dif1 = 'Not applicable.'
      dif2 = 'Not applicable.'
      dif3 = 'Not applicable.'
      was_high_low_correct = 'Not applicable.'
    print('Difference between actual and previous price    :' + str(dif2))
    print('Difference between predicted and previous price :' + str(dif3))
    print('Prediction of high and low was correct?         : ' + str(was_high_low_correct))
    print('Difference between predicted and actual price   : ' + str(dif1))
    print('')
    if was_high_low_correct :
      TrueResult = TrueResult + 1
    else:
      FalseResult = FalseResult + 1
  print('Num of True: ' + str(TrueResult))
  print('Num of False: ' + str(FalseResult))
  print('Rate of true: ' + str((TrueResult/(FalseResult+TrueResult))*100) + '%')
  result = pandas.DataFrame(scaler.inverse_transform(predicted))
  result.columns = ['predict']
  result['actual'] = scaler.inverse_transform(y_test)
  result.plot()
  plt.show()

For the csv, download it from Yahoo finance. For S&P for example, you can download it from here:
https://finance.yahoo.com/quote/%5EGSPC/history?period1=1533394800&period2=1534604400&interval=1d&filter=history&frequency=1d


Saturday, April 7, 2018

Laravel: how to start

Table of contents
1. how to start
2. create a basic user creation page
3. create unit tests for Laravel 5.7

At first, you need a development environment. Make your environment following those steps written here. And you should have a development environment now.

Move to vagrant shared folder:
$ cd /vagrant

Install composer.
$ curl -sS https://getcomposer.org/installer | php
$ sudo mv composer.phar /usr/local/bin/composer

Check if composer was successfully installed:
$ composer

If this is displayed, composer was successfully installed.

Run the following to update composer:
$ composer self-update

Install laravel with composer:
$ composer create-project --prefer-dist laravel/laravel laravel
The last red word laravel is a name of the app. It can be anything like "laravel", "mylaravel" or "myproject". You shouldn't use "su" or "sudo" command when installing composer or laravel because it might cause errors (the system or normal users sometimes can't access folders/files that were made by super users.)

laravel is installed.

If you are using Apache

Now open httpd.conf (which is a conf file of apache) and configure properly.
$ sudo vi /etc/httpd/conf/httpd.conf

Like this. Please make sure that the directory of the setting is "/var/www/html".
<Directory "/var/www/html" />
    Options FollowSymLinks
    AllowOverride All
    Require all granted
</Directory>


This is optional but you can change the DocumentRoot:
DocumentRoot "/var/www/html/laravel/public"
DocumentRoot is a directory out of which Apache will serve your documents (.html, .php, .py and so on...). The URL is changed at the same time. http://192.168.33.10/laravel was the URL to access, but after changing the DocumentRoot, the URL is http://192.168.331.10.

For CentOS7:
$ sudo systemctl restart httpd.service
For CentOS6:
$ sudo service httpd restart 

If you are using Nginx


Open your default.conf of Nginx.
$ sudo vi /etc/nginx/conf.d/default.conf

Then change your root:
server {
    listen       80;
    server_name  localhost;
    root   /usr/share/nginx/html/laravel/public;
 
    ...(abbreviated)...

Restart Nginx.
$ sudo systemctl restart nginx

If you want to use subdirectory for laravel, check this stackoverflow.

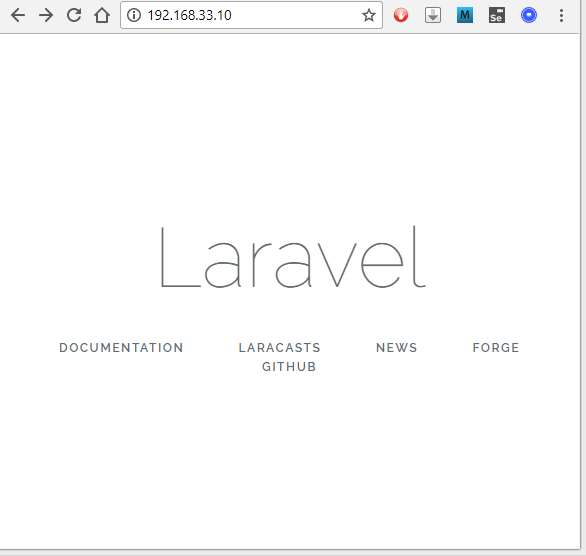
Check if Laravel is working


See http://192.168.33.10/ if Documentroot is changed. If not, see http://192.168.33.10/laravel/public/ from your browser. You can see that laravel is working:


--- optional below ---
If you see errors because it can't write in the log file, run the following command to change the folder's owner.
For Apache users:
$ sudo chown -R apache:apache /vagrant/laravel/storage
For Nginx (with php-fpm) users:
$ sudo chown -R php-fpm:php-fpm /vagrant/laravel/storage

If this doesn't work, change/add the following line in Vagrantfile.
For Apache users:
config.vm.synced_folder "./", "/vagrant", type: "virtualbox", owner: 'vagrant', group: 'apache', mount_options: ['dmode=777', 'fmode=777']
For Nginx (with php-fpm) users:
config.vm.synced_folder ".", "/vagrant", type: "virtualbox", owner: 'vagrant', group: 'php-fpm', mount_options: ['dmode=777', 'fmode=777']
And "vagrant reload".

If even that doesn't work, it might be because of SE linux. Turn off SE linux this way:
$ sudo getenforce
Enforcing
$ sudo setenforce 0
$ sudo getenforce
Permissive
--- optional above ---

Database


Now database configuration. Create a table for laravel.
$ mysql -u root -proot
mysql> CREATE DATABASE test;
mysql> exit

If your DB information is:
Database name: test
username: root
password: root

Change the database configuration (\laravel\config\database.php) like this:
        'mysql' => [
            'driver' => 'mysql',
            'host' => env('DB_HOST', '127.0.0.1'),
            'port' => env('DB_PORT', '3306'),
            'database' => env('DB_DATABASE', 'test'),
            'username' => env('DB_USERNAME', 'root'),
            'password' => env('DB_PASSWORD', 'root'),
            'unix_socket' => env('DB_SOCKET', ''),
            'charset' => 'utf8mb4',
            'collation' => 'utf8mb4_unicode_ci',
            'prefix' => '',
            'strict' => true,
            'engine' => null,
        ],
Save and close the file.

Change the .env file too.
$ cd /vagrant/laravel
$ sudo vi .env

DB_CONNECTION=mysql
DB_HOST=127.0.0.1
DB_PORT=3306
DB_DATABASE=test
DB_USERNAME=root
DB_PASSWORD=root
Save and close the file by ":wq".

Now laravel can access your mysql database.

Add a page


Open /routes/web.php and add a new page.


Added my-page.
Route::get('/my-page', function () {
    return view('my-page');
});


And add my-page.php (or my-page.blade.php to use laravel's blade syntax).

Write this code in the my-page.blade.php. And save it.
<?php
echo "Hello Laravel!!!";

Then see the page from your browser: http://192.168.33.10/my-page


If your laravel's view doesn't change whatever you write in your my-page.blade.php, clear the cache:
$ cd /vagrant/laravel
$ php artisan view:clear

This is how you make a website with Laravel. But Laravel, by default, doesn't have a variety of powerful tools unlike Cakephp3 (Laravel is faster though). If you think you need powerful tools for your coding, use plugins for Laravel.


Errors when merging arrays in PHP

You can run code online here: http://www.writephponline.com/

At first, try this code:
$array;
$array2 = [1, 2, 3];
$array3 = array_merge($array, $array2);
print_r($array3);

You get an error saying "array_merge(): Argument #1 is not an array on line 3".
Why? It's because arguments of array_merge can not be null. So, for example,
$array = CustomerEntity.getCustomersWithAppointment();
$array2 = [1, 2, 3];
$array3 = array_merge($array, $array2);
print_r($array3);
this works as long as CustomerEntity.getCustomersWithAppointment() returns array value, but doesn't work when it returns null.

To avoid this problem, parse the arguments to array.
$array;
$array2 = [1, 2, 3];
$array3 = array_merge((array)$array, $array2);
print_r($array3);

Or check if the arguments are array.
$array;
$array2 = [1, 2, 3];
if(is_array($array)){
    $array3 = array_merge($array, $array2);
}else{
    $array3 = $array2;
}
print_r($array3);


VBA Blinking on sheet (Excel VBA)

At first, open Excel and VBA window. Add a module from the window.

Right click on this or click Insert from the menu and insert a module.


In the module, add this code:
Sub Blink()
  Const ColorIdx1 = 37
  Const ColorIdx2 = xlColorIndexNone
If Worksheets("Sheet1").Range("A1").Interior.ColorIndex = ColorIdx1 Then
    Worksheets("Sheet1").Range("A1").Interior.ColorIndex = ColorIdx2
    Worksheets("Sheet1").Range("A2").Interior.ColorIndex = ColorIdx1
Else
    Worksheets("Sheet1").Range("A1").Interior.ColorIndex = ColorIdx1
    Worksheets("Sheet1").Range("A2").Interior.ColorIndex = ColorIdx2
End If
    Application.OnTime Now + TimeValue("00:00:01"), "Blink"
End Sub


Then add this code in ThisWorkBook:
Private Sub Workbook_Open()
 Blink
End Sub

ThisWorkbook is here.


Run the Blink function. A1 and A2 of Sheet1 will blink every 1 second.

Wednesday, April 4, 2018

Sunday, April 1, 2018

Egg info error

Command "python setup.py egg_info" failed with error code 1 in ....

This error sometimes happens when we try to install with pip.
The reason might be:

1. You are trying to install a module that is supposed to be for python2 by pip3.
If you try to install python2's module with pip3, the egg info error happens. Maybe vice versa. Check if the module really matches with your pip version. It's very likely the modules for python2 can't be used for python3.

2.  You don't have setuptools for python2/python3.
According to this post in stackoverflow, the egg info error happens when you don't have setuptools.
Try to install setuptools like this.
$ pip install --upgrade setuptools
$ pip install ez_setup
And try to install the module again.

If this didn't work, try:
$ pip install --upgrade --user setuptools
And try to install the module again.

Or this can be good too if you want to use python3.5 explicitly.
$ python3.5 -m pip install --upgrade --user setuptools
(--user option might be unnecessary. ) And try to install the module again.