Install Python3 (64bit)
At first, we need to install Python3 to use Keras. Keras can be used with Python3 64 bit version, not with 32 bit version. So please make sure your PC is 64 bit and install Python3 64 bit version.
Access to the Python's website:
https://www.python.org/

Python's website
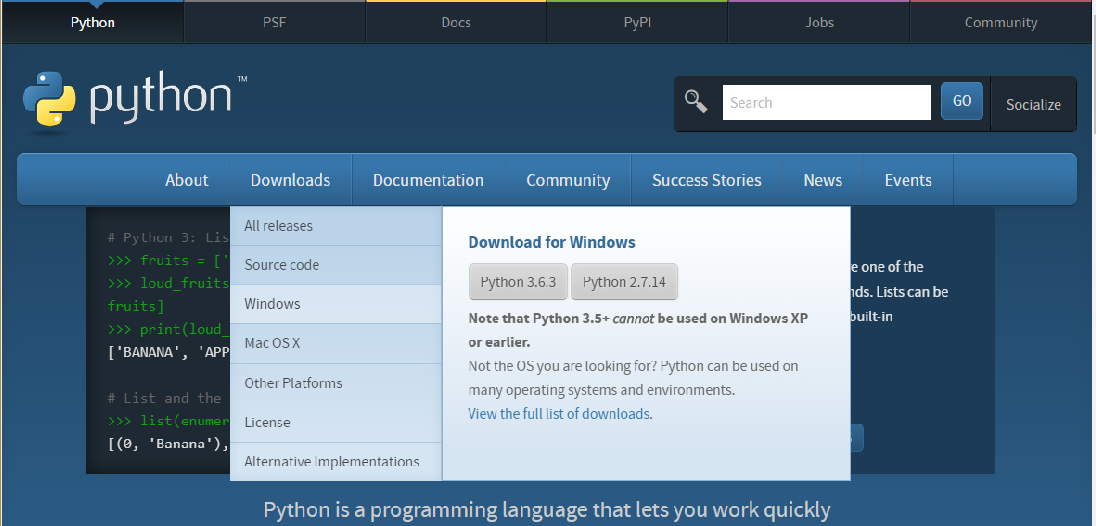
Select Downloads -> WIndows

Choose "Windows x86-64 web-based installer" of python 3.6.
(Because, as of November 2017, tensorflow supports only 3.5 and 3.6.)

Run the installer. Make sure to check "Add Python to PATH"
Now follow the instruction of the installer and install the Python3 for 64bit version.
After the installation, on the command prompt, check if the installation went successfully.
python -V
Python 3.6.3
Python 3.6.3
If the version is displayed, the installation is success. If not, it's fail. We need to re-try to install Python3 (maybe, in that case, python is not added to PATH).
Install Keras
Run the command prompt as administrator (just in case).

If you install Python3, you can use pip also on the command prompt.
pip -V
pip 9.0.1 from c:\users\jack\appdata\local\programs\python\python36\lib\site-pack
ages (python 3.6)
pip 9.0.1 from c:\users\jack\appdata\local\programs\python\python36\lib\site-pack
ages (python 3.6)
Now we will install Keras using pip. Run the following command:
pip install Keras
Install Tesorflow:
(if your PC doesn't have GPU):
pip install --upgrade tensorflow
(if your PC has GPU):
pip install --upgrade tensorflow-gpu
Other packages too:
pip install matplotlib
pip install h5py
pip install pillow
pip install pillow
Create a text file and rename it as "test.py". (If the extension isn't shown, change the setting to show the extension at first)

Copy and paste the following in the test.py:
#!/usr/bin/env python
# -*- coding: UTF-8 -*-
from keras.datasets import mnist
from keras.models import Sequential
from keras.layers.core import Dense, Activation
from keras.utils import np_utils
# Get the default MNIST data
(X_train, y_train), (X_test, y_test) = mnist.load_data()
X_train = X_train.reshape(60000, 784) / 255
X_test = X_test.reshape(10000, 784) / 255
y_train = np_utils.to_categorical(y_train)
y_test = np_utils.to_categorical(y_test)
# Network
model = Sequential([
Dense(512, input_shape=(784,)),
Activation('sigmoid'),
Dense(10),
Activation('softmax')
])
# Compile
model.compile(loss='categorical_crossentropy', optimizer='sgd', metrics=['accuracy'])
# Learning
model.fit(X_train, y_train, batch_size=200, verbose=1, epochs=20, validation_split=0.1)
# Forecast
score = model.evaluate(X_test, y_test, verbose=1)
print('test accuracy : ', score[1])
Then save it.
Go to the directory on command prompt. For example:
cd C:\Users\Jack\Documents\workplace\New folder
Run the test.py:
python test.py
If the machine learning of MNIST started, the set up is success!!

Now you can create & run programs of Keras with your Windows PC!!