Windows 8.1 for the host machine.
CentOS 6 for the guest machine.
At first, you need to install oracle virtualbox. Install it from here:
https://www.virtualbox.org/
And you need .iso file to make a virtual machine. We will use CentOS 6.x this time, so install CentOS 6 iso file from here:
http://isoredirect.centos.org/centos/6/isos/x86_64/
Tips: Or, if you want older version of CentOS, install the .iso file from here:
http://vault.centos.org/
CentOS 6.4 iso file can be installed from here for example:
(64 bit) http://vault.centos.org/6.4/isos/x86_64/
(32 bit) http://vault.centos.org/6.4/isos/i386/
Also, you would need to check this post to use yum: Use "yum update" for old CentOS5 that is already EOL
Choose CentOS 6.9 (x86_64) 64bit minimal iso and download it.

After installing Virtualbox, you should have a shortcut for Virtualbox manager on desktop. Click the shortcut on desktop and start the Virtualbox manager.

And you will see the manager will be opened. Click "New" at the upper left:


You will see the following. Click "Expert Mode":

Check if each item is ok and if you confirmed all of them are ok, click "Create".

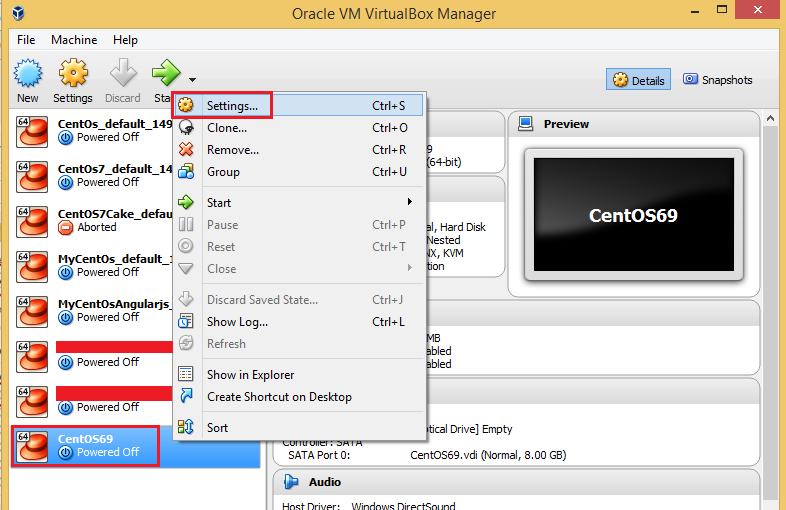
You will see your CentOS69 virtual machine is added. Right-click on it and click "Setting".

You will see the following. Choose "Storage" and click the DVD icon that is next to "Controller: IDE".

Click "Choose disk".

Choose the .iso file which you downloaded at the beginning. Then click "Open".

Confirm that the .iso file was added under "Controller: IDE". Then click "OK".

Now change the network setting also. If you choose "Bridged Adapter", you can share the virtual machine within a team. If you don't want to share the virtual machine with anyone, "Host-only Adapter" is enough. We will choose "Bridged Adapter" for this time.

Choose the virtual machine we have made and click "Start" at the upper left.

You will see the CentOS 6 will be started. Choose "Install or upgrade an existing system" and hit the Enter key on your keyboard.
(You would realize, once you click on the virtualbox's window, your mouse cursor is trapped inside the window. To exit from the window, press right ctrl key on your keyboard. If your keyboard doesn't have right ctrl key, press ctrl + alt + del)

Choose "Skip" and hit the Enter key.

Choose "English" and click "Next". Then almost same window will appear, so choose "U.S. English" and click "Next".

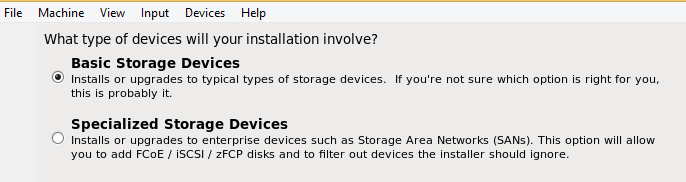
Choose "Basic Storage Devices" and click "Next".
Choose "Yes, discard any data" and click "Next".

You will see the following at the lower left after clicking the button. Click "Configure Network".

Make sure to check "Connect automatically" and click "Apply". Then click "Next".

You will see the following. You can choose which time zone you will use for the system. If you want to use the local time for the system clock, un-check "System clock uses UTC". Or else, leave it and then click "Next".

You can decide what password will be used for the root account. This is a virtual machine that exists and works inside your PC, so if you don't allow it connect to external network, I think the password doesn't need to be very complicated. Write whatever you want for the password. (It needs to be at least 6 letters). Then click "Next".

Choose "Use All Space" and click "Next".

Click "Write changes to disk".

Your system will start being configured.

When the configuration is finished, click "Reboot".

The virtual machine will be rebooted like this:

The login user is "root". The password is the password that you made previously.


You made the password in this step
Once you could login to the virtual machine, run this command:
# yum -y update
"#" is not needed to input. It just indicates you are a root user.
If you have everything done successfully, the yum update should get started like the following image.
If you could update it successfully, hooray! :)

If not get started, it is likely that you are using older version of CentOS.
Or your network setting is wrong (did you choose "connect automatically"?)
For other tips, check here: When virtual machine on virtualbox can't connect to internet.

You should have seen this while configuring the virtual CentOS.
You need to check "Connect automatically".
Shared folder setting
Now we will configure for a shared folder between the host machine and guest machine.
At first, install necessary packages for sharing folders.
# yum -y install bzip2 dkms gcc gcc-c++ kernel-devel kernel-headers make
Then reboot the machine.
# shutdown -r now
Set path:
# export KERN_DIR=/usr/src/kernels/$(uname -r)
# export MAKE='/usr/bin/gmake -i'
# export MAKE='/usr/bin/gmake -i'
Now insert GuestAddition CD image:

Maybe you need to insert it twice.
Then run the following commands:
# mount /dev/cdrom /mnt
# ls /mnt
# ls /mnt
If the following is displayed, you have done it successfully.

Now run the following commands:
# cd /mnt
# sh VBoxLinuxAdditions.run
# sh VBoxLinuxAdditions.run
If the following is shown, you have done it successfully.

Shutdown the virtual machine now.
# shutdown -h now
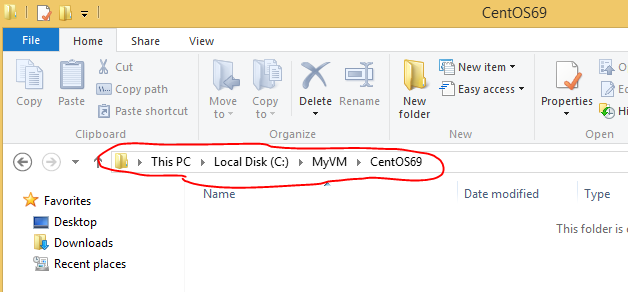
Create a folder to share in host machine.
Then, on the VM virtual box manager, open the setting.
Open the "Shared folders".


Maybe there should be an error. To remove the error, open "Storage" and if you see two "VBoxGuestAdditions.iso" files under "Controller:IDE", remove one of them. Then the error should be gone. Now click "OK".

Start the virtual machine now.

Run this command:
# mount -t vboxsf -o dmode=777,fmode=777 CentOS64 /mnt
(tips: CentOS64 is a name of the shared folder in the host machine. If you gave it an other name, change the command to reflect the shared folder's name.)Check if the folder is successfully shared. Put some random file inside the shared folder in the host machine.

Then check if this file can be accessible from the guest machine.
Run this command on the virtual machine.
# ls /mnt
If you can see the file from the guest machine like the following, you have done everything successfully. Now you can use the shared folder. :)

Disable SELinux
Security-Enhanced Linux (SELinux) is a Linux kernel security module. But it causes a lot of troubles and is not necessary most of time during development. So we will disable SELinux.
To disable SELinux, open the following file.
# vi /etc/selinux/config
Then change Selinux to be disabled.
SELINUX=disabled
Then restart the virtual machine.
# shutdown -r now